How to Kickstart Your Guitar Career on YouTube: A Comprehensive Step-by-Step Guide
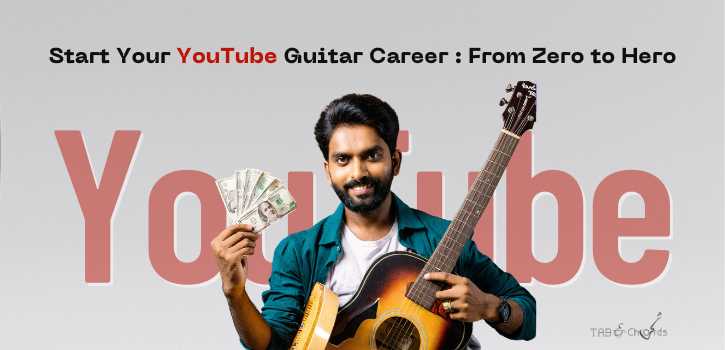
YouTube offers an incredible platform for guitarists to showcase their talent, teach others, and build a community. Whether you’re just starting or looking to enhance your existing channel, this guide will provide you with detailed steps and all the necessary tools and accessories to succeed. Let’s dive into creating a thriving guitar-focused YouTube channel!
1. Define Your Niche and Audience
a. Identify Your Niche
Choosing a specific niche helps you stand out and attract a dedicated audience. Consider the following types of content:
- Guitar Tutorials and Lessons: Teach techniques, scales, chords, and songs. Cater to beginners, intermediate, or advanced players.
- Cover Songs: Perform popular songs in your style. Focus on a specific genre (e.g., rock, pop, jazz) or mix it up.
- Original Music: Share your compositions. This can include instrumental pieces or songs with vocals.
- Gear Reviews and Demos: Review guitars, amps, pedals, and other equipment. Provide honest and detailed opinions.
- Music Theory and Composition: Teach theory concepts, songwriting tips, and more.
- Genre-Specific Content: Dive deep into genres like blues, metal, classical, or acoustic fingerstyle.
b. Know Your Audience
Understanding your target audience is crucial for tailoring your content:
- Demographics: Age, gender, location, and language.
- Skill Level: Beginners, intermediate players, or advanced musicians.
- Interests: Are they interested in learning, entertainment, or gear?
2. Create a Content Plan
a. Develop a Content Calendar
Consistency is key on YouTube. Plan your uploads and stick to a regular schedule:
- Frequency: Decide how often to post (e.g., once a week, twice a month).
- Types of Videos: Mix tutorials, covers, reviews, and personal vlogs to keep content fresh.
b. Brainstorm Video Ideas
Create a list of potential topics:
- Series Ideas:
- Beginner Guitar Lessons: Start with basic chords and progress to full songs.
- Guitar Techniques: Focus on specific techniques like fingerpicking, tapping, or sweep picking.
- Music Theory Mondays: Explain theory concepts like scales, modes, and chord progressions.
- Trending Topics: Keep an eye on trends in the music industry and YouTube.
c. Script and Storyboard
Outline your videos to ensure clear delivery:
- Introduction: Briefly introduce yourself and the video topic.
- Content: Break down the lesson or performance. Use bullet points or sections.
- Conclusion: Recap, provide a call to action (like subscribing or commenting), and thank your viewers.
3. Essential Equipment and Software
a. Video Recording Equipment
High-quality visuals are crucial for a professional look:
- Camera:
- Budget Options: Smartphones with good cameras (iPhone, Samsung Galaxy).
- Mid-Range: Compact cameras like Canon G7X, Sony ZV-1.
- Professional: DSLR/mirrorless cameras (Canon EOS R, Sony A7 III).
- Tripod: A sturdy tripod is essential to keep your shots steady. Consider a flexible tripod for versatility.
- Lighting: Proper lighting improves video quality:
- Softbox Lights: Provide soft, even lighting.
- Ring Light: Great for face lighting and small setups.
- LED Panels: Adjustable color temperature and brightness.
b. Audio Recording Equipment
Clear audio is just as important as video:
- Microphone:
- USB Microphones: Easy to set up (Blue Yeti, Audio-Technica AT2020 USB).
- XLR Microphones: Higher quality, requires an audio interface (Shure SM7B, Rode NT1-A).
- Lavalier Mics: Clip-on mics for hands-free recording (Rode Wireless GO).
- Audio Interface: Required for XLR microphones. Options include Focusrite Scarlett 2i2, PreSonus AudioBox.
- Pop Filter: Reduces plosive sounds, essential for vocal recordings.
c. Accessories
Enhance your recording setup:
- Headphones: Closed-back headphones for monitoring audio (Audio-Technica ATH-M50x, Sony MDR-7506).
- Guitar Accessories:
- Capo: For changing keys easily.
- Picks: Various thicknesses for different tones.
- Tuner: Clip-on or pedal tuners for quick tuning.
- Spare Strings: Always have backups.
- Green Screen (Optional): Use for creative backgrounds and effects.
d. Editing Software
Post-production is where your video comes together:
- Video Editing Software:
- Paid Options: Adobe Premiere Pro, Final Cut Pro.
- Free Options: DaVinci Resolve, HitFilm Express.
- Audio Editing Software:
- Free: Audacity.
- Paid: Adobe Audition, Logic Pro X.
4. Setting Up Your Recording Space
a. Choose a Quiet Location
Minimize background noise for better audio quality:
- Room Treatment: Use carpets, curtains, and foam panels to reduce echo.
- Avoid Noisy Areas: Stay away from windows, noisy appliances, and busy streets.
b. Set Up Your Background
Your background sets the tone for your videos:
- Clean and Organized: A clutter-free space looks more professional.
- Thematic: Use music posters, guitars, or a simple backdrop that reflects your channel’s theme.
c. Arrange Lighting
Proper lighting makes a huge difference:
- Key Light: Main source of light, positioned in front of you.
- Fill Light: Fills in shadows, placed opposite the key light.
- Back Light: Adds depth by lighting the background or your hair and shoulders.
5. Recording Your Videos
a. Warm-Up and Practice
Prepare before hitting record:
- Warm-Up Exercises: Warm up your fingers and voice if you’ll be singing.
- Practice: Rehearse the song, lesson, or speech to ensure smooth delivery.
b. Set Up Your Equipment
Double-check everything:
- Camera Position: Frame yourself well, ensuring the guitar is visible.
- Microphone Placement: Position the microphone for optimal sound capture.
- Test Shots: Record a short test to check video and audio quality.
c. Record Multiple Takes
Don’t worry about perfection:
- Multiple Takes: Record several takes to have options during editing.
- Focus on Clarity: Prioritize clear explanations and demonstrations.
d. Engage with Your Audience
Create a connection:
- Eye Contact: Look at the camera to engage with viewers.
- Body Language: Be expressive and use hand gestures when appropriate.
- Ask Questions: Encourage comments and interaction.
6. Editing and Post-Production
a. Edit Your Video
Craft a polished final product:
- Trimming: Cut out mistakes and unnecessary parts.
- Transitions: Use simple transitions to maintain a smooth flow.
- Sync Audio and Video: Ensure your audio and video are perfectly synchronized.
b. Add Titles and Graphics
Enhance your video’s professionalism:
- Intro/Outro: Create a branded intro and outro.
- Lower Thirds: Use for your name, video title, or other information.
- On-Screen Text: Add text for chords, tabs, or key points.
c. Mix and Master Audio
Ensure the best sound quality:
- Audio Levels: Balance background music and speaking volume.
- Noise Reduction: Remove any background noise.
- EQ and Compression: Enhance clarity and consistency.
d. Export in the Right Format
Choose the best settings for YouTube:
- Resolution: 1080p (1920×1080) is standard; 4K is optional.
- Frame Rate: 24, 30, or 60 fps depending on your style.
- Codec: H.264 for good quality at smaller file sizes.
7. Uploading and Optimizing Your Videos
a. Create a Compelling Thumbnail
A good thumbnail attracts clicks:
- High-Resolution: Clear and visually appealing.
- Faces and Text: Faces attract attention; use bold, readable text.
- Consistency: Use a consistent style for branding.
b. Write an Engaging Title and Description
Optimize for search and viewer interest:
- Title: Clear, descriptive, and includes keywords.
- Description: Summarize the video, include relevant links, and add timestamps if necessary.
- Links: Include links to your social media, website, and relevant products.
c. Use Tags and Hashtags
Help your video get discovered:
- Tags: Use relevant keywords and phrases related to your video.
- Hashtags: Include up to three hashtags in your video description.
d. Set Up Playlists
Organize your content:
- Thematic Playlists: Group similar videos together (e.g., “Beginner Lessons,” “Cover Songs”).
- Series Playlists: Create a playlist for series (e.g., “Music Theory Mondays”).
8. Promoting Your Channel
a. Share on Social Media
Leverage other platforms to grow your audience:
- Instagram: Share clips, behind-the-scenes content
Bonus Tips and Additional Strategies
To further enhance your YouTube channel and grow your audience, consider the following tips and strategies:
1. Engage with Your Community
a. Respond to Comments
- Take the time to reply to comments on your videos. Engaging with your viewers builds a sense of community and encourages more interaction.
b. Host Q&A Sessions
- Create videos where you answer questions from your audience. This can be a great way to address common queries and connect with your viewers.
c. Utilize Community Posts
- Use YouTube’s Community tab to share updates, polls, and behind-the-scenes content. It’s a great way to keep your audience engaged between video uploads.
2. Optimize for YouTube Search and Algorithm
a. Use Strong Keywords
- Research and use relevant keywords in your titles, descriptions, and tags. Tools like Google Keyword Planner and TubeBuddy can help you find the best keywords.
b. Create Engaging Thumbnails and Titles
- Your thumbnail and title are the first things viewers see. Make sure they’re eye-catching and accurately represent your content.
c. Focus on Watch Time and Retention
- YouTube values watch time and viewer retention. Create engaging intros, avoid long-winded explanations, and keep your videos concise and engaging.
3. Diversify Your Content
a. Experiment with Different Formats
- Try live streams, short-form videos (YouTube Shorts), or even vlogs. This diversity can attract different segments of viewers.
b. Collaborate with Other Creators
- Collaborations can introduce your channel to new audiences. Reach out to other YouTubers, especially those within your niche.
c. Seasonal and Trending Content
- Create content around holidays, seasons, or trending topics. This can boost your channel’s visibility and relevance.
4. Monetization Strategies
a. Ad Revenue
- Join the YouTube Partner Program to earn money from ads. Ensure your content adheres to YouTube’s monetization policies.
b. Affiliate Marketing
- Promote products and gear you use, providing affiliate links in your video descriptions. You’ll earn a commission for sales made through your links.
c. Merchandise and Services
- Offer branded merchandise, guitar lessons, or other services. Platforms like Teespring can help with merchandise, while Patreon can support lessons or exclusive content.
d. Sponsored Content
- As your channel grows, you may attract sponsorship deals. Always disclose sponsored content to maintain transparency with your audience.
5. Improve Your Skills and Content Quality
a. Learn from Analytics
- Regularly check YouTube Analytics to understand what works and what doesn’t. Analyze metrics like watch time, click-through rate, and audience demographics.
b. Continuously Improve Your Skills
- Keep honing your guitar playing, recording, and editing skills. The better your content, the more likely viewers are to subscribe and share.
c. Seek Feedback
- Encourage your audience to provide feedback. Constructive criticism can help you improve and better serve your viewers.
6. Maintain a Positive and Authentic Persona
a. Be Yourself
- Authenticity resonates with viewers. Be genuine in your videos and share your unique perspective and personality.
b. Stay Positive and Professional
- Handle criticism and negative comments gracefully. Focus on building a positive community around your content.
Building a successful YouTube channel as a guitarist takes time, effort, and dedication. By following these detailed steps and utilizing the bonus tips, you’ll be well-equipped to create high-quality content, engage with your audience, and grow your channel. Remember, consistency and passion are key. Keep experimenting, learning, and sharing your love for music, and success will follow.


